Getting started with Flow
This article is a quick start guide to using Flow.
Signing up
To use flow, you will need to be signed up to a plan. All subscriptions are handled through the EposNow App Store and if you haven't installed our app yet, you can choose a plan and get started.
Getting started
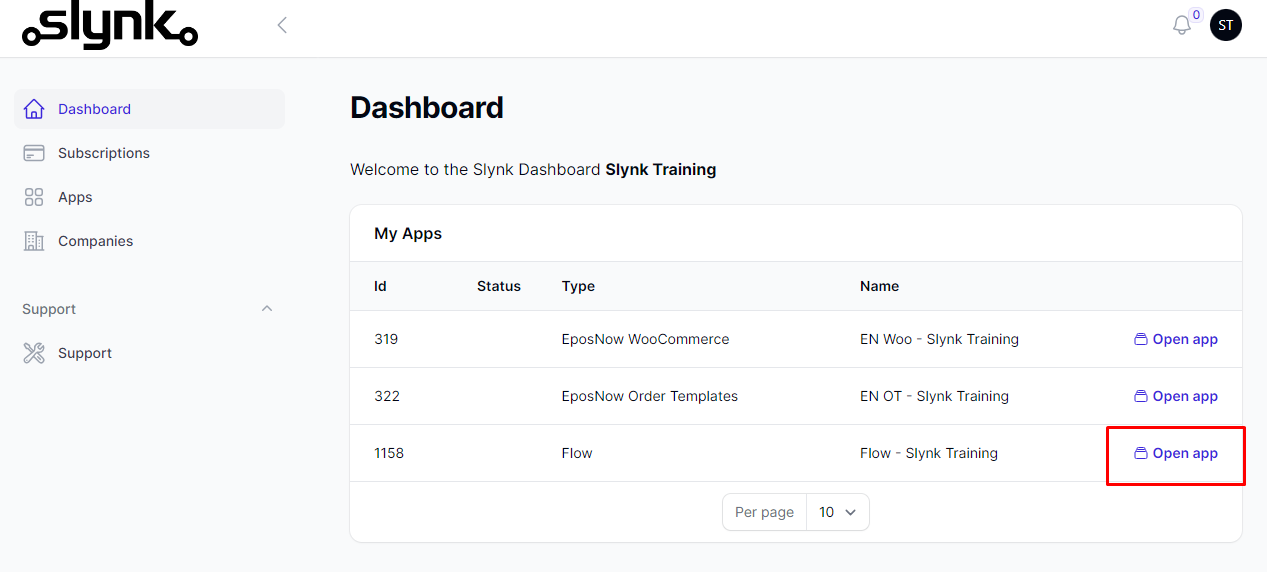
Once you have signed up, you will receive a welcome email from us with your login details for our dashboard. If you already have an account with us, the flow app will be added to your existing account. Log in to the dashboard and you will be able to see Flow in your list of apps. Open the app to start using it.
How it works
You can create as many flows as you like on our dashboard and choose which ones are active, and whether they should run automatically on a schedule, or manually via our dashboard. Each flow has 3 basic stages:
- Fetch the data
- This is where you define which data you want to work with, for example EposNow products
- Flow will then fetch this data from the EposNow API
- Filter the data
- Once the data has been fetched, you can define filters so that only the records that match your filters pass through to the action stage below
- An example would be only products that are in selected categories
- Actions
- For each record that passes the filters, you can define which actions should be taken on the data. For example, you can add 5% to the cost price and 10% to the selling price.
- When setting up the flow, you can decide if the data should be updated on EposNow via the API, or if you simply want it exported into a CSV file
When a flow runs, it uses tasks. The number of tasks you have available per month depends on the plan you signed up for. You can easily upgrade/downgrade via the EposNow app store. You can read more about tasks and what counts as a task in this article.
Setting up your first flow
Open the Flow App
Once you are logged in to the dashboard, you will see a list of your apps.
Open the Flow app and this will open up the Flow Dashboard. On this page you can see an overview of your flows including the task usage.
Create a Flow
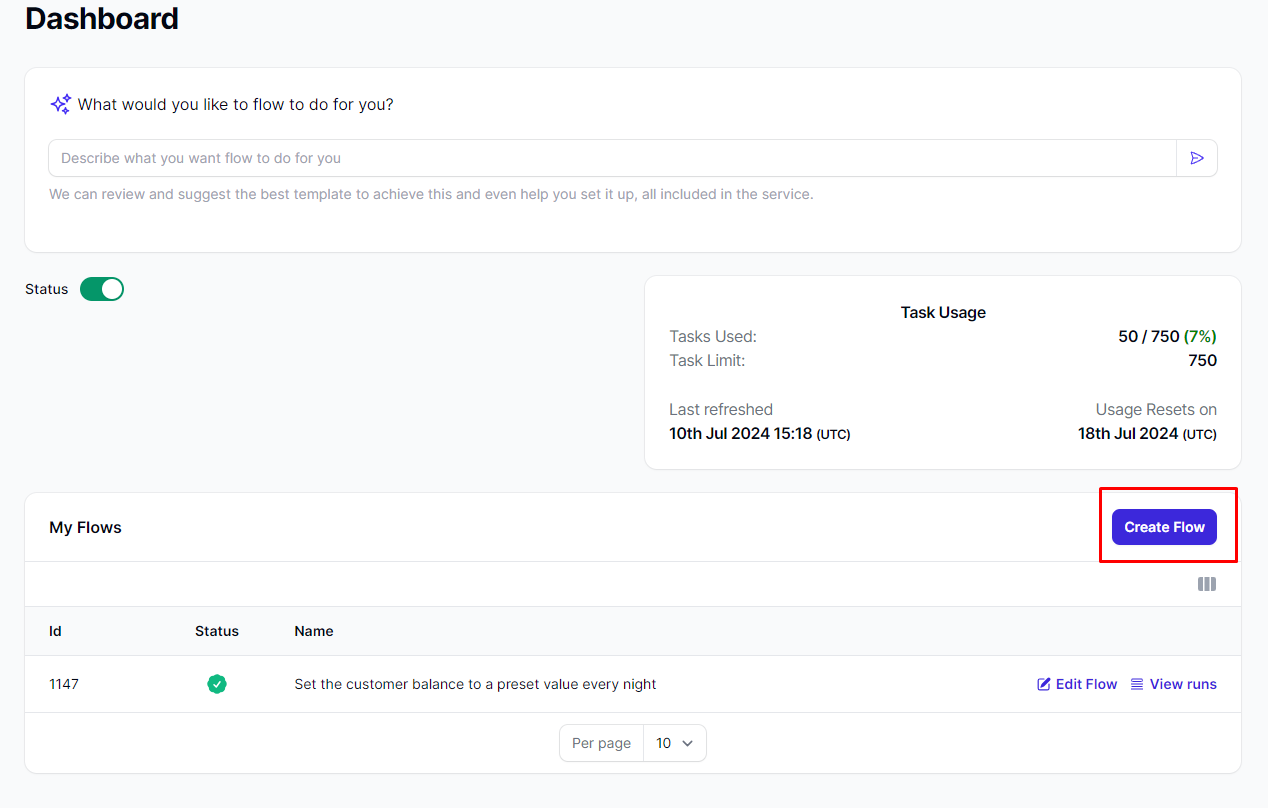
You can click on the create flow button to create a new flow. This will load up some ready made templates that you can use as a starting point.
There are several filters available as well as a search to help you find the right template to get started. If you need any help at all with this, open a ticket with us and we will help you get the flows set up to meet your needs.
Click on try this template on the template that matches your requirements. You can edit the flow as needed, so you can select any template that is close to what you need.
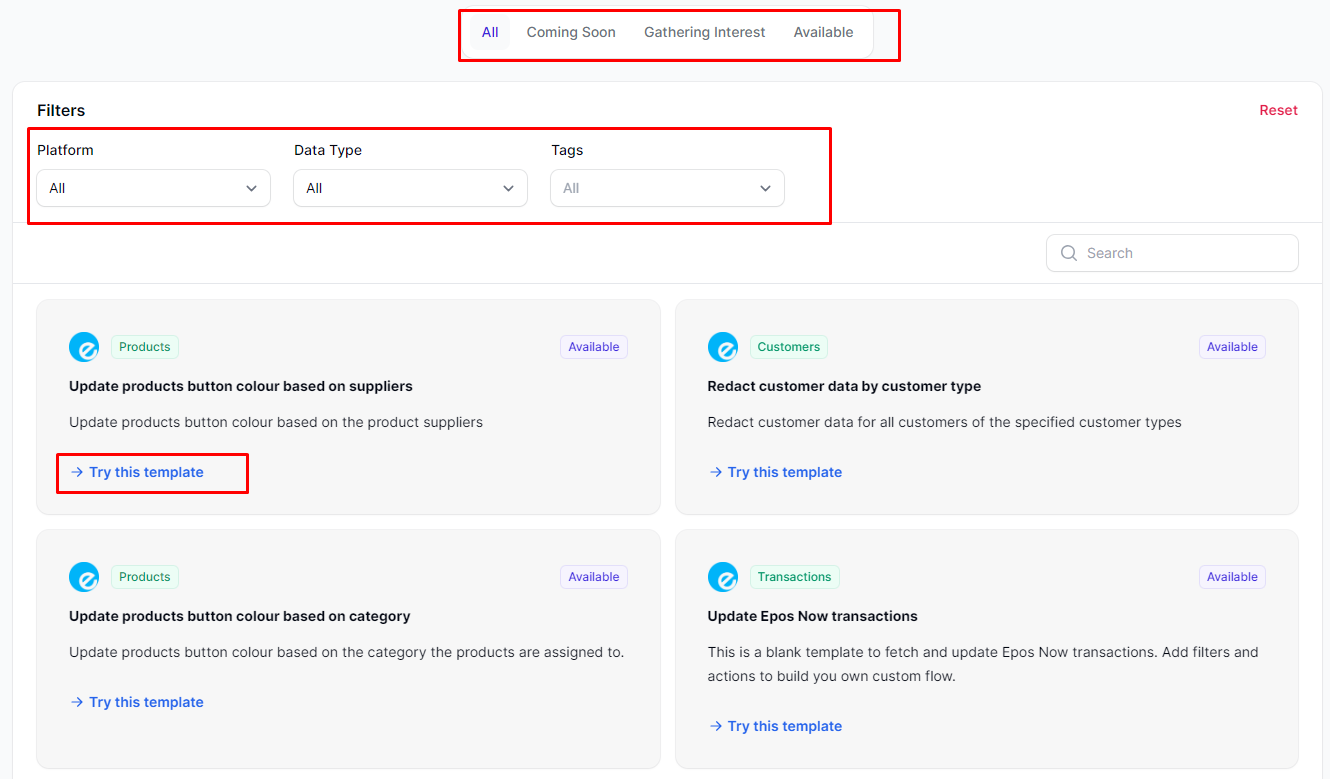
This will then create a new flow for you based on the template that you selected, and you can then review it and customise as needed.
Review & Customise
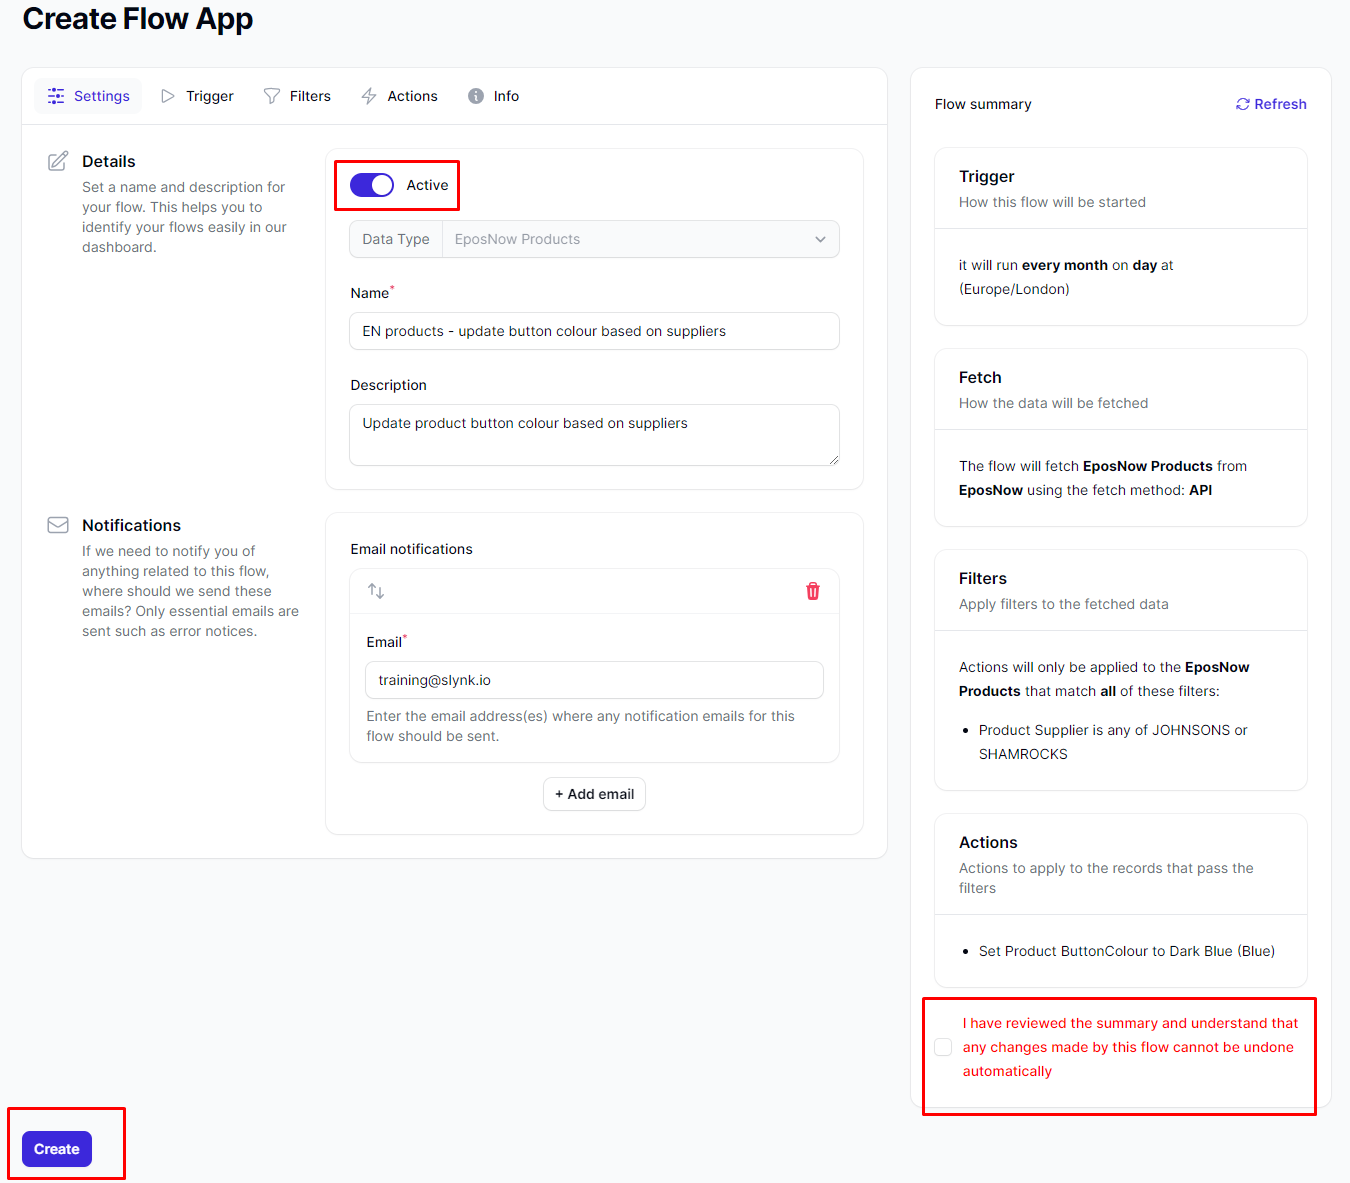
You will now be able to review and customise the flow. On the right hand side, a simple summary is shown which describes what your flow will do so you can ensure it sounds right. This updates as you change the settings on the flow.
Settings

In the settings section, you can set a name and description for your flow. This helps you identify the flows and allows you to enter a description you can refer to in the future. You can also add notification email addresses that should be notified if the flow fails to run for any reason. You can add multiple email addresses to be notified by clicking on the add email button.
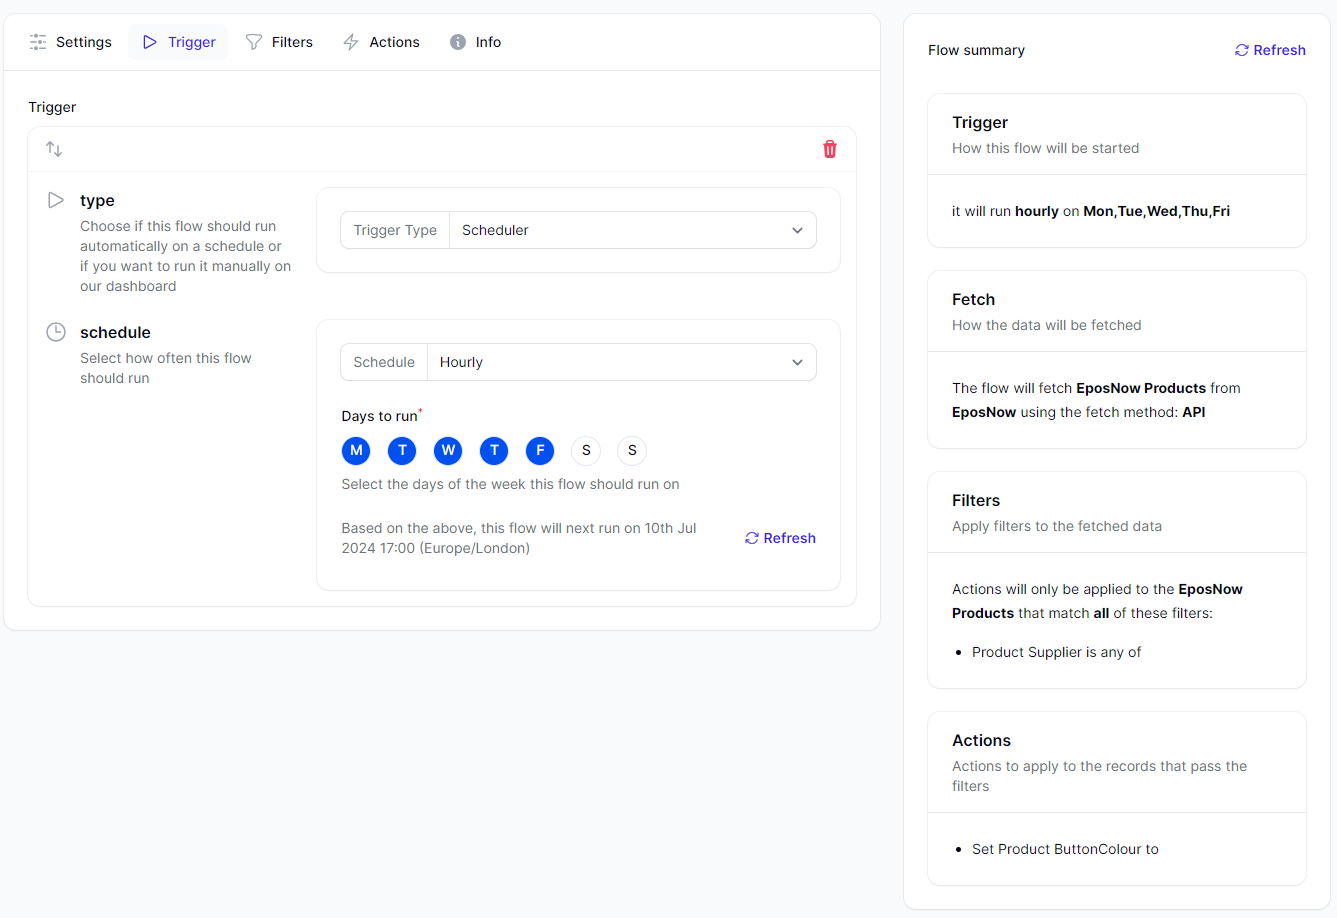
Trigger
This section allows you to set how this flow should run. There are currently 2 options:
- Manual Run
- This means the flow can only be run by clicking on a button on our dashboard
- Scheduler
- You can set the flow to run automatically on a schedule. The options available are:
- Hourly (see example in screenshot below)
- Choose which days of the week this should run on
- Daily
- Select which hour of the day it should run on
- Weekly
- Select the days of the week and which hour of the day it should run
- Monthly
- Select the day of the month and which hour of the day it should run
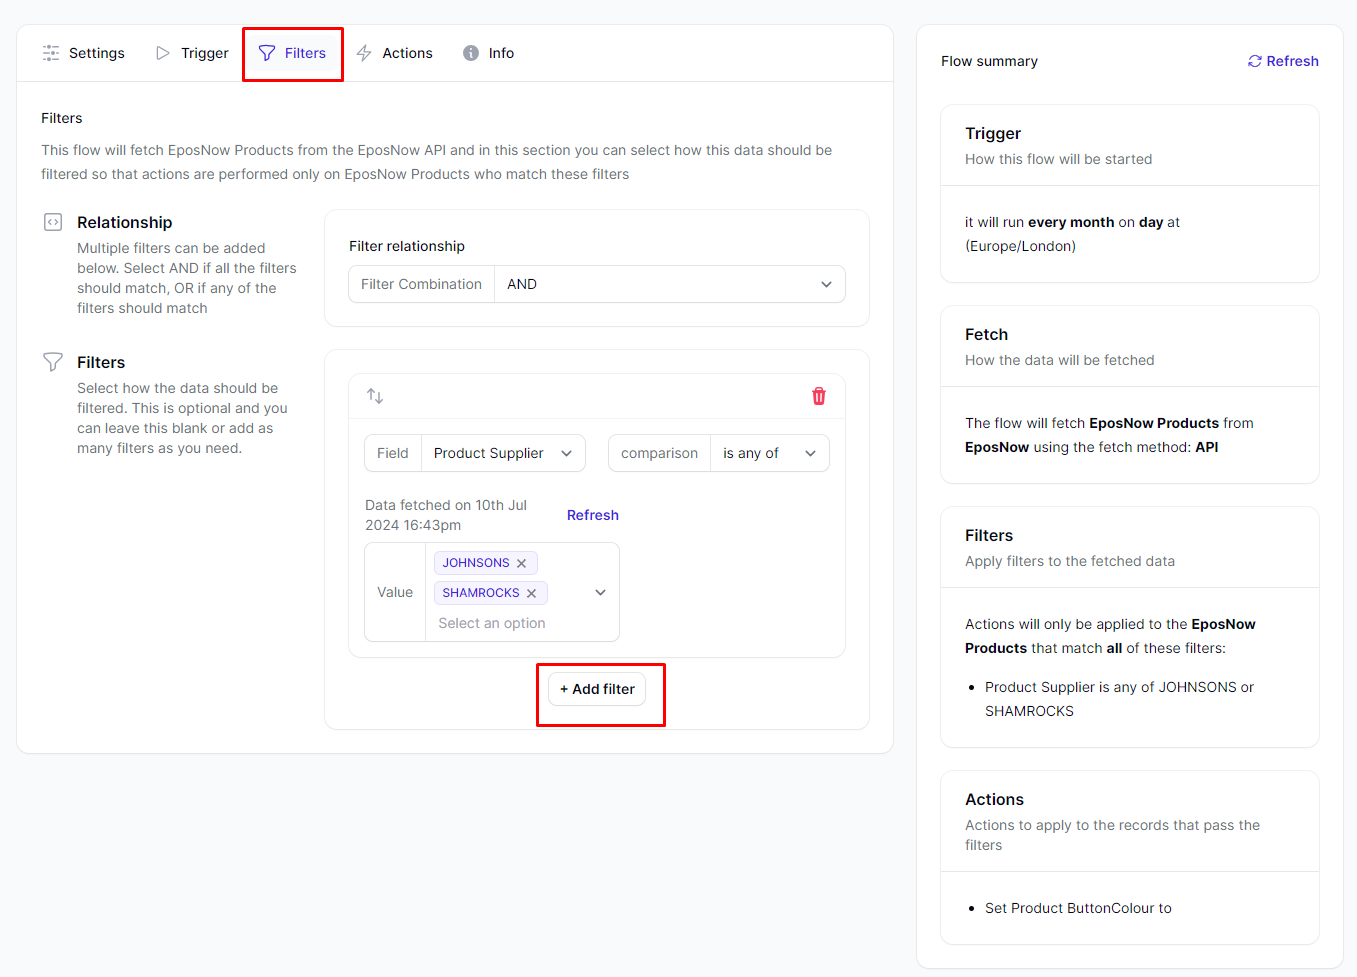
Filters
In this section, you can define as many filters as you want. You can also apply multiple filters to the same field and they will be applied in sequence. You can drag and drop to change the sequence.
You can also choose whether all the filters should apply (set the filter combination to AND) or any one of them (set the filter combination to OR).
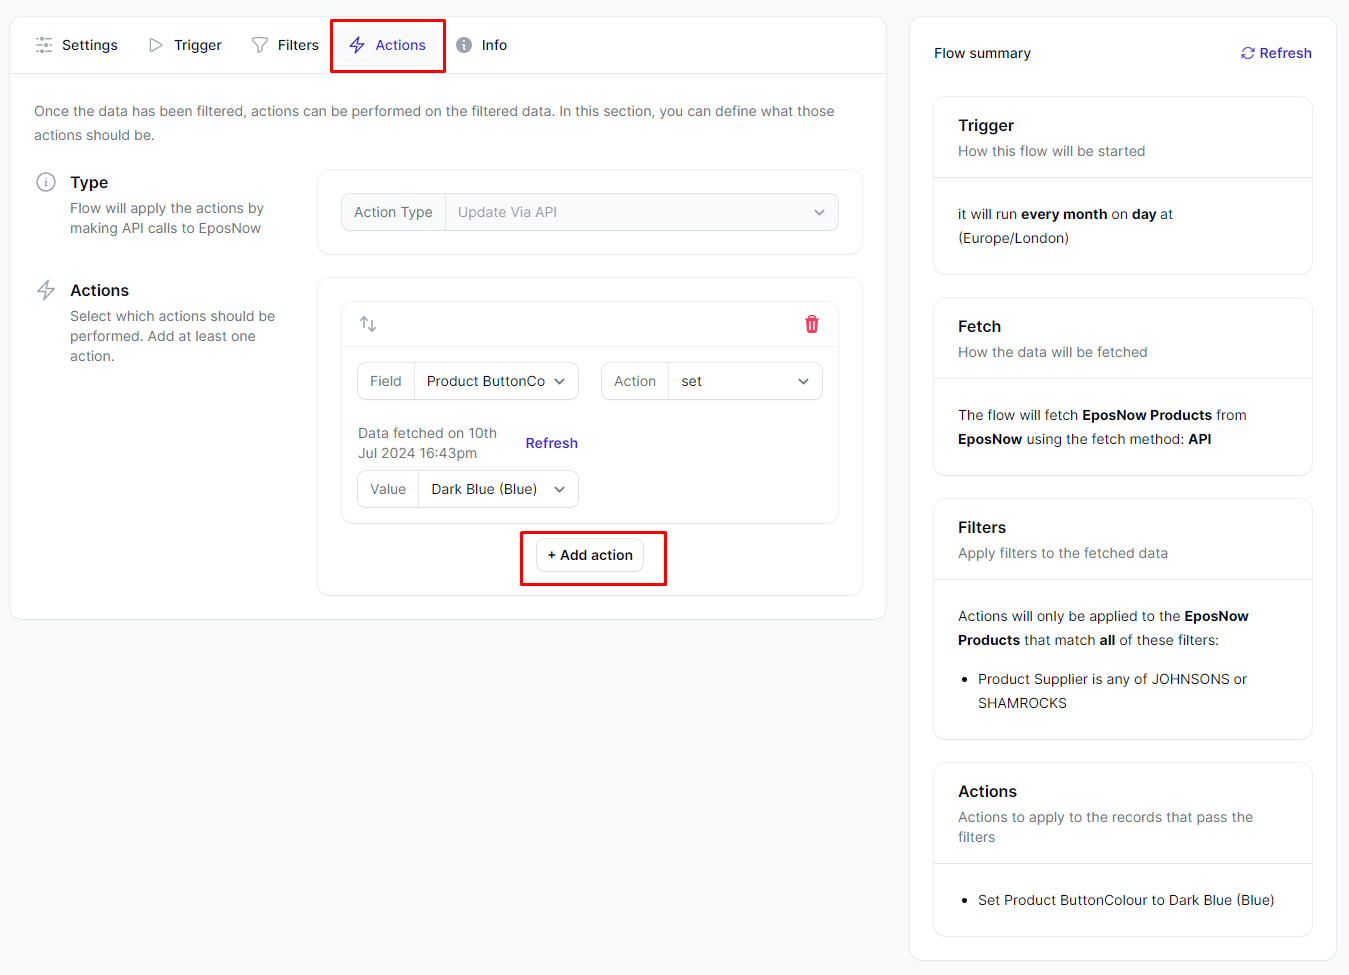
Actions
In this section, you can add the actions that should be applied to each record that passes the filters you set up above.
You can add multiple actions for multiple fields.
You can even apply multiple actions to the same fields for more complex operations.For example, add 10 to the product price and then add 5%.
Activating your flow
Before you activate your flow, you must confirm that you have checked the summary and that this all looks OK to you. This is because any actions taken by the flow are not automatically reversible.
 We recommend that you run a simulation first so you can see which records pass the filters and the actions that would have been taken. This will run with real data on your account but will not apply the actions to the records, it will just simulate them. You will not be billed for simulations. This is also a good way to get an estimate on the number of tasks that will be used when the flow runs.

We are also happy to review the flow for you. Simply click on the review this flow for me link and this will automatically request a review from us. We will review the flow and even arrange a call with you if required to make sure the flow will do what you want.